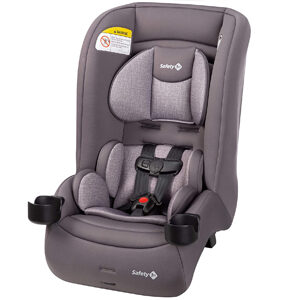
Safety 1st Jive
Face Rear & Front
- Weight range (lb): 5-40 (RF); 20-65 (FF)
- Height limits: 40" (RF); 49” (FF)
- Stage: 1st, 2nd
- Lifespan: 10 years
Looking for a toddler car seat that ticks the boxes of the standard safety, weight and height range, and affordability, while also being easy to install? The Safety 1st Jive convertible car seat is for you. Boasting the luxuries and specs of child safety seat well beyond its price tag – but without losing the focus on the basics that make the Safety 1st Jive performance so reliable – the Safety 1st Jive is a feature-rich, forward-thinking toddler car seat that’s tailor-made for kids from birth to preschool. It’s the best budget option for families with several kids in a car seat.
*Price may change due to promotion or brand marketing.
This post contains affiliate links. As an Amazon Associate, we earn from qualifying purchases. Thank you for your support!
Safety First Jive Review - Budget Convertible Car Seat for Travel
Pros & Cons
The good and the bad
What is it best for
Who we recommend it for
Value for Money
Is it worth the price tag?
Design
Dimensions, weight, color, etc
Safety Rating
Crash tests, FMVSS213, SIP
Performance
Weight/height limits, airplane, etc
Installation
Install with LATCH or seat belt
Alternatives
Other car seats to consider
1. Pros and Cons
Pros
- Super budget price
- Fits 3 across in the back seat of most vehicles
- Lightweight and portable design
- 10 years of lifespan
Cons
- Less headrest and recline
- Lack advanced additional features
2. Who Is It Best For?
Will the Safety 1st Jive be a good option for your child and your family?
At a price of around $100, the Safety 1st Jive is a budget toddler car seat with nice features, making it the best option for parents who have a tight budget or families that have several kids in a car seat or want to get a second car seat for backup.
It’s a lightweight child safety seat (only 14.25 lb) with a relatively slim (17.5-inch wide) design, making it portable from vehicle to vehicle. The budget price won’t add too much to child restraints If you want to install one car seat in different motor vehicles.
The Jive is also an excellent toddler car seat. Great weight and height range, is highly portable, and with enough reclines to provide your kid with great safety and comfort. It’s by far Safety 1st’s best offering for toddlers between 0 to 5 years old – and it won’t break the bank, either.
Further Information
3. Value for Money
Is the price tag worth it?
If there’s one thing you can say about Safety First car seats, it’s that they provide excellent value for money.
The ‘Grow and Go’ is the best 3-in-1 car seat you can buy for a price under $200, while the Jive is a top contender in that under $100 bracket in the convertible car seats.
More cheap Safety first car seats include the Comfort Cool model, which is the cheapest one among the 50 lb rear-facing car seats, and the Turn and Go 360 DLX ranks top for the cheap price among the best rotating car seats.
Unlike more expensive models from Graco and Britax – that match the Jive for performance, like the Britax Marathon ClickTight – you’re not paying for a big brand name. Instead, you’re paying for specs and features.
It’s true that the Jive is less impressive in additional features, but just the basic and very common to ensure your kid’s safety and comfort. It’s still reliable with approval to meet or exceed the US FMVSS 213 standards.
For parents who prefer extra features, you can find out more in the ‘Alternatives’ section below.
Further Information
4. Safety 1st Jive Review: Design
Dimension and Width
The Safety 1st Jive is a slender car seat. It beats its competitors in this point and ranks the no.1 to fit 3 across.
With a 17.5-inch width, the Jive is a good narrow convertible car seat. But it’s not as slim fit as the famous Diono Radian 3R, which comes with a 17-inch width. And the latter comes from a popular brand – Diono, which is famous for its 3-across fit feature.
Featuring an 18.13-inch depth, the Safety 1st Jive beats other models in the convertible car seat series, meaning that it won’t seize a lot of space from back to front, even installing rear-facing.
However, the height is greater than others like the Graco Extend2Fit and Britax Marathon ClickTight (23.5”), and Chicco NextFit Zip (25”), making the Jive seem slim on the whole.
Without any doubt, the Safety 1st Jive is capable of fitting 3-across in most motor vehicles, even small cars. Along with its cheap price tag, the Jive is great for families who have several kids and need to install different child restraints in the back seat.
Safety 1st Jive Review: Portability
Weighing at just 14.25 pounds, the Safety 1st Jive is certainly a lightweight toddler safety seat. Combining this with its slim design, the Jive absolutely gets a high score on portability, with a rating of 8 out of 10.
The high score makes Jive the best among boosters, convertibles, and all-in-one car seats. Just not as well as an infant car seat, just like the Diono Radian 3R. But it lacks the foldable base but is more lightweight.
The Safety 1st Jive is certified for airplane use. This means that you can effortlessly carry it from home to the airport, due to its lightweight body great for air travel.
If you want to install it from vehicle to vehicle, pay attention to its rear-facing installation problem that most moms complain about on Amazon. Supposedly, the lack of reclines and highback results in this.
That’s why we don’t recommend you to switch it from vehicle to vehicle.
Further Information
Two Cup Holders
There are two removable cup holders on both sides. The smart design that attaches them closely to the front does not increase the Jive’s width.
They are big and deep enough to carry most bottles or a few snacks. It’s better not to put the hot liquids in the cup holder, avoiding splashes on your precious baby.
For the same reason of no harm, it’s recommended to use plastic containers, but not glass or metal containers. No sharp or pointed objects in Cup Holder, avoiding these objects could hit you or your child and cause serious injuries in a crash.
Head and Body Pillow
Head and body pillows are useful to provide extra head and body support for your baby in the car seat. You can easily attach it for use by sliding the tabs on the back of the head pillow into the slots in the headrest pad.
As your baby grows, they can stably ride in the device, then you can remove it, just gently pull the tabs on the back of the head pillow out of the headrest pad. I’m sure your big kid will love the extra comfy ride that the plush padding provides.
Machine Washable Fabrics
You won’t have much time to constantly clean up messes, by hand? That’s not convenient. Luckily, the Safety 1st Jive is made of machine-washable fabric that is dryer safe.
You can easily remove the pad off the seat and throw it into the washing machine for cleaning, then dry it for daily use soon with the dryer.
A clean and decent car seat ensures your kid’s comfortable for the car trips.
5. Safety 1st Jive Review: Safety Ratings
Even as a traditional brand for manufacturing child restraints for a long history, Safety 1st does not seem to dig deeply into exploring additional features in safety more than the basic and mandatory tests certifications.
The Safety 1st Jive, just like its ultra-performance Grow and Go model, comes with entry-level safety ratings as well. This might be the reason why Safety 1st car seats are cheaper than other models for the same purpose.
But this does not mean that Safety 1st Jive is not safe for riding. At least, it passes the standard crash tests that are required for all car seats sold in the US market.
First, it meets or exceeds the child restraint criteria for a frontal crash test under the US FMVSS 213.
Second, it’s approved for safe use with the 5-point harness for side impact protection.
So you don’t have to worry much about the protection to ride your boys or girls.
Some parents prefer the more expensive models like the Britax Marathon because of its ClickTight and SafeCell protection system. They also think the heavier and sturdier give them confidence in providing better protection.
Additional techniques and features may add points, but they’re not the deciding factor for a car seat to protect your little one during a car trip.
You should always trust a car seat’s reliable safety performance.
6. Safety 1st Jive Review: Performance
3-Across Fitting
Featuring a slim body earns Safety First Jive a great deal of praise among big families who have two or three kids to ride in the car seat.
However, you should never place the car seat overlap with other car seats, avoiding any loose and incorrect installation.
Weight and Height Limits
Safety 1st Jive is an average toddler car seat, with no outperformed weight or height limit compared to its competitors, especially in the rear-facing top height and weight range.
It is designed with a 40-pound weight limit and 40-inch height limit for rear-facing, making the Jive good to ride for 2-year-old toddlers facing the back.
Even its 40-pound-weight-limit is not as great as Graco Extend2Fit’s 50-pound top rear-facing weight limit, and the 40-inch-height-limit is beaten by the Chicco Nextfit Zip’s 43-inch top rear-facing height limit.
But Safety 1st Jive is much cheaper than both models, whilst the top weight and height limits are as good as any of its competitors.
The Jive is capable of riding a boy or girl toddler from 29-inch tall and 20-pound heavy to his or her preschool time within the weight of 65 pounds and the height of 49 inches.
All in all, the Safety 1st Jive may not be the “fanciest” car seat out there, but upon the weight and height limits, it seemed to be just “fine”.
Age Range
Thanks to its superb weight and height range as a convertible car seat, the Safety 1st Jive is suitable for newborns from day one to big kids up to 5 years old – If your littles do not grow much faster than their peers.
If you want to keep your boy or girl facing the rear for a long time, better after their second birthday, the Jive is a great option, thanks to its 40-pound and 40-inch top weight and height limits.
After switching it to a front-facing position, the Safety 1st performs as well as other models – with the same 65-inch top weight and 49-inch top height. That means big 7-year-olds can stay in this car seat until they outgrow the limitations.
As your child is nearing the top height and weight limits, it’s a good idea to move your child to a booster, high back or backless model is good.
Stages
Budget price does not affect Safety 1st Jive’s performance. This child restraint is able to go through the first two car seat stages – rear-facing and forward-facing.
Safety First 2-in-1 Airplane
Is a Safety First Jive car seat allowed on planes?
This restraint is FAA-certified for aircraft use, as the 5-point harness will be used for all its lifetime,
If the aircraft lap belt is too short, ask the flight attendant for a belt extender. Use only on forward-facing aircraft seats. Contact the airline for their specific policies.
Some airlines may ask to see a label stating that this car seat is certified for aircraft use. There is an airplane certification label located on the side of this car seat.
Installing the Jive on airplanes is the same as installing it on motor vehicles, including both rear-facing installation and forward-facing installation.
Further Information
Safety 1st Jive Review: Lifespan
How long is Safety 1st Jive car seat good for
In the Safety 1st Jive user manual, the manufacturer indicates that you should not use this car seat more than 10 years after the date of manufacture.
You may not use the Safety 1st Grow & Go for a complete 10-year life cycle, because the lifespan starts from the date it was manufactured, not the day you purchase the car seat.
But it’s good enough to ride your child until they are ready to use the seat belt. 8-year-old is the most common age requirement in most state car seat laws that no need to travel in a car seat.
You can find the date of manufacture label on the side of the car seat, under the cup holder’s position.
Further Information
Safety 1st Jive Review: Warranty
The manufacturer promises that the Safety 1st Jive is warranted against defective materials or workmanship for one year from the date of original purchase.
You should prepare the original receipt to validate your warranty.
To make a claim under this warranty, please contact their Consumer Care Department by phone: at 1-800-544-1108 or text: at 1-812-652- 2525.
Proof of purchase is required and shipping charges are the responsibility of the consumer.
7. Safety 1st Jive Review: Installation
Rear-facing Installation for Safety First Jive
Rear-Facing Vehicle Belt Install
1. Pull Down Recline Stand to Unlock and Fold It Under Car Seat Loosely attach the tether hook to its storage attachment before folding the recline stand. Fold the recline stand and then gently tighten the tether strap to remove slack.
2. Place Car Seat Rear-Facing in Back Seat
3. Check Rear-Facing Level Lines For children between 5-22 lb (2.3-10 kg), the bottom level line on the shell must be parallel with the ground. For children 22-40 lb (10.1-18 kg) who can sit up unassisted, rotate the car seat between the 2 level lines. Start by making the bottom level line parallel with the ground, then rotate the car seat up. Do not rotate past the top-level line.
4. Check if Your Vehicle Belts Will Work With This Car Seat This is very important because not all vehicle belts will work with car seats. Review pages 21-24 and your vehicle owner’s manual to find out what kind of vehicle belts you have and how to lock a car seat in place.
5. Locate Rear-Facing Belt Path
6. Route Vehicle Belt Thread the vehicle belt into the RearFacing Belt Path opening as shown. The belt goes: • across the car seat; AND • under the car seat pad; AND • in front of the buckle; AND • out the other Rear-Facing Belt Path opening. Do not twist the belt.
7. Buckle Vehicle Belt
8. Tighten Belt Place your hand in the car seat. Firmly push the car seat down and back towards the vehicle seat back while pulling the shoulder belt or the free end of the lap belt parallel with the Rear-Facing Belt Path as shown.
9. Check Belt Tightness Hold the car seat at the Rear-Facing Belt Path with your weaker hand. Push and pull the car seat from side to side. It should not move more than 1 in. (2.5 cm).
If it moves more than 1 in. (2.5 cm), you can try: • Pulling the belt tighter; OR • Reinstalling the car seat; OR • Changing to a different seating location, OR • Switching to LATCH: lower anchor belt installation if lower anchors are available in your vehicle
10. Secure Child in Car Seat To properly secure your child in the car seat, see pages 48-50. Check your child’s fit often and make any needed adjustments to the car seat as they grow.
11. Recheck Rear-Facing Level Lines Redo the installation if the car seat is not reclined correctly for your child.
You may need to place a tightly rolled towel(s) or foam pool noodle(s) under the front of the car seat to help get the correct recline angle for the Rear-Facing Level Line. Check often to make sure padding is still in place and the belt is tight.
Finished! Check the tightness of the install often to make sure it has not loosened.
Rear-Facing LATCH: Lower Anchor Install
1. Remove Lower Anchor Belt from Storage Attachments Or if the lower anchor belt was used Forward-Facing, remove it from the Forward-Facing Belt Path so both hooks are on the same side of the car seat as shown
2. From Bottom of Car Seat, Release Pad’s Elastic Straps From Tabs
3. Pull Seat Pad Off Front of Shell
4. Locate Rear-Facing Belt Path Thread the lower anchor hook through the Rear-Facing Belt Path opening as shown. The lower anchor belt adjuster can be on either side of the car seat.
5. Route Lower Anchor Belt The belt goes: • across the car seat; AND • under the car seat pad; AND • in front of the buckle; AND • out the other Rear-Facing Belt Path opening. Do not twist the belt.
6. Pull Down Recline Stand to Unlock and Fold It Under Car Seat Loosely attach the tether hook to its storage attachment before folding the recline stand. Fold the recline stand and then gently tighten the tether strap to remove slack.
7. Place Car Seat Rear-Facing in Back Seat
8. Check Rear-Facing Level Lines For children between 5-22 lb (2.3-10 kg), the bottom level line on the shell must be parallel with the ground. For children 22-40 lb (10.1-18 kg) who can sit up unassisted, rotate the car seat between the 2 level lines. Start by making the bottom level line parallel with the ground, then rotate the car seat up. Do not rotate past the top-level line.
9. Attach Lower Anchor Hooks to Vehicle’s Lower Anchors in Seat Bight Review your vehicle owner’s manual for LATCH: lower anchor locations and lower anchor belt use. Fasten one hook to one vehicle lower anchor bar. Then repeat for the second hook on the other side of the car seat.
10. Tighten Belt Place your hand in the car seat. Firmly push the car seat down and back towards the vehicle seat back while pulling the free end of the belt as shown.
It may be easier to tighten the belt by pulling back the seat pad and pulling the free end of the belt towards you and parallel with the belt path as shown.
11. Check Belt Tightness Hold the car seat at the Rear-Facing Belt Path with your weaker hand. Push and pull the car seat from side to side. It should not move more than 1 in. (2.5 cm).
12. Secure Child in Car Seat To properly secure your child in the car seat, see pages 48-50. Check your child’s fit often and make any needed adjustments to the car seat as they grow.
13. Recheck Rear-Facing Level Lines Redo the installation if the car seat is not reclined correctly for your child.
Safety 1st Jive Forward-facing Installation
Forward-Facing Vehicle Belt + Tether Install
1. Pull Recline Stand Out from Under Seat and Push Up to Lock into Place
2. Place Car Seat Forward- Facing in Back Seat Make the car seat flush against the vehicle seat. The vehicle seat back must be upright.
3. Loosely Attach Tether Hook to Vehicle’s Tether Anchor Check your vehicle owner’s manual for specific tether (top anchorage) anchor locations.
4. Check if Your Vehicle Belts Will Work With This Car Seat This is very important because not all vehicle belts will work with car seats. Review pages 21-24 and your vehicle owner’s manual to find out what kind of vehicle belt you have and how to lock a car seat in place.
5. Locate Forward-Facing Belt Path
6. Route Vehicle Belt Thread the vehicle belt through the Forward-Facing Belt Path opening as shown. The belt goes: • across the car seat; AND • under the car seat pad; AND • out the other Forward-Facing Belt Path opening. Do not twist the belt.
7. Buckle Vehicle Belt
8. Tighten Belt Place your hand in the car seat. Firmly push the car seat down and back towards the vehicle seat back while pulling the shoulder belt or the free end of the lap belt parallel with the Forward-Facing Belt Path as shown.
9. Tighten Tether Push firmly on the back of the car seat and pull the free end of the tether strap to remove all of the slack.
10. Check Belt Tightness Hold the car seat at the ForwardFacing Belt Path with your weaker hand. Push and pull the car seat from side to side. It should not move more than 1 in. (2.5 cm).
Forward-Facing LATCH: Lower Anchor + Tether Install
1. Remove Lower Anchor Belt from Storage Attachments Remove the belt from the RearFacing Belt Path so both hooks are on the same side of the car seat as shown.
2. Locate Forward-Facing Belt Path Thread the hook through the ForwardFacing Belt Path as shown. The lower anchor belt adjuster can be on either side of the car seat.
3. Route Lower Anchor Belt The belt goes: • across the car seat; AND • under the car seat pad; AND • out the other Forward-Facing Belt Path opening. Do not twist the belt.
4. Pull Recline Stand Out From Under Seat and Push Up to Lock into Place
5. Place Car Seat ForwardFacing in Back Seat Make the car seat flush against the vehicle seat. The vehicle seat back must be upright.
6. Loosely Attach Tether Hook to Vehicle’s Tether Anchor Check your vehicle owner’s manual for specific tether (top anchorage) anchor locations.
7. Attach Lower Anchor Hooks to Vehicle’s Lower Anchors in Seat Bight Review your vehicle owner’s manual for LATCH: lower anchor locations and lower anchor belt use. Fasten one hook to one vehicle’s lower anchor bar. Then repeat for the second hook on the other side of the car seat
8. Tighten Belt Place your hand in the car seat. Firmly push the car seat down and back towards the vehicle seat back while pulling the free end of the belt as shown.
9. Tighten Tether Push firmly on the back of the car seat and pull the free end of the tether strap to remove all of the slack.
10. Check Belt Tightness Hold the car seat at the ForwardFacing Belt Path with your weaker hand. Push and pull the car seat from side to side. It should not move more than 1 in. (2.5 cm).
If it moves more than 1 in. (2.5 cm), you can try: • Putting your knee in the car seat and pulling the belt tighter; OR • Reinstalling the car seat; OR • Changing to a different seating location; OR • Switching to vehicle belt installation
Finished! Check the tightness of the install often to make sure it has not loosened.
Securing Child in Car Seat
1. Place Child in Car Seat Your child’s bottom and back should be flat against the car seat. Position the harness straps over your child’s shoulders and upper thighs.
2. Buckle Harness Push the buckle tongues into the buckle until you hear them “click”. Pull up on the harness straps to make sure the buckle is locked.
3. Fasten Chest Clip Insert the right half of the chest clip into the left half and snap it together.
4. Tighten Harness Pull the harness adjustment strap straight out to snugly tighten the harness system.
5. Position Chest Clip Slide the chest clip up the harness straps and position it at mid-chest (even with armpits) and away from your child’s neck.
6. Check Harness Tightness Try to pinch the harness strap at the shoulder vertically between your index finger and thumb as shown. If your fingers slip off, the harness system is tight enough. If you can pinch the harness strap, tighten it more.
Finished! Your child is now secured in the car seat. Check your child’s fit often and make any needed adjustments to the car seat as they grow.
To Remove Child from Car Seat: 1. Loosen Harness Strap 2. Unbuckle Harness 3. Release Chest Clip 4. Remove Child
Safety 1st Jive Review: User Manual
You can find the user manual of Safety 1st Jive in a small storage bag on the back near the bottom. After receiving the car seat, you should find this and read the manual instructions at the very beginning before you install it in your motor vehicle.
Or you can always find the online user manual on its official website, or download the PDF here.
8. Safety First Jive Review: Specs
Brand | |
Brand | |
Type | |
Suitable for | Newborns, toddlers, and preschoolers |
Positions | Rear-facing and forward-facing |
Design | |
Portability (1-10) | 8; lightweight and slim |
Weight (lb.) | 14.25 |
Weight limits (lb.) | 5-40 for rear-facing, and 20-65 for a 5-point harness |
Height limit (inch) | 19-40” for rear-facing, 29-49” for forward-facing |
Dimension | 29.75 x 18.13 x 16.25 ” (H x D x W) |
Cup holder | Two on both sides |
Performance | |
Age Range | 0-7 years old |
Stage | 1st, 2nd |
Longevity | 0-7 years old |
Installation | LATCH and seat belt |
Headrest Positions | – |
Recline Positions | 2 |
Airplane | Yes |
Lifespan | 10 Years (Check Safety 1st car seat expiration.) |
Extra Features | Fit 3 across |
9. Alternatives
What other car seats should you consider?
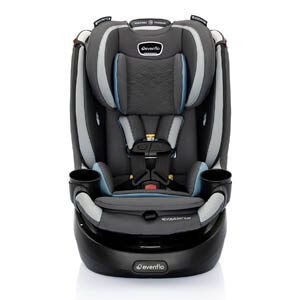
Evenflo Revolve360 Slim
- Weight range (lb): 4-50 (RF); 22-65 (FF)
- Height limits: 17-48” (RF); 28-49" (FF)
- Stage: 1st, 2nd
- Lifespan: 10 years
- Suitable: Birth to 4~5 years old
Why is it better than Safety 1st Jive?
- 360 degrees rotation
- Higher rear-facing weight limit (+10 lb; 50 lb vs 40 lb)
- Higher rear-facing height limit (+8"; 48" vs 40")
- More headrest positions (+9; 14 vs 5)
- More reclines (+7; 9 vs 2)
- More padding for max comfort
Why is it worse than Safety 1st Jive?
- More expensive (+$220; $329.99 vs $109.99)
- Heavier body (+14 lb ; 28.2 lb vs 14.25 lb)
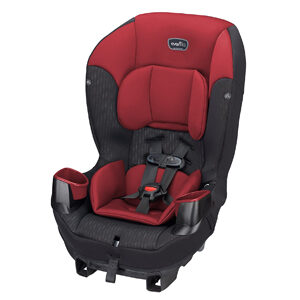
Evenflo Sonus 65
- Weight range (lb): 5-40 (RF); 22-65 (FF)
- Height limits: 19-40” (RF); 28-50" (FF)
- Stage: 1st, 2nd
- Lifespan: 10 years
Why is it better than the Safety 1st Jive?
- Higher forward-facing height limit (+1”; 50” vs 49”)
- More lightweight for carrying (11.5 lb vs 14.25 lb)
Why is it worse than Safety 1st Jive?
- Slightly more expensive (+$10; $119.99 vs $109.99)

- Weight range (lb): 5-40 (RF); 22-65 (FF)
- Height limits: 43” (RF); 49" (FF)
- Stage: 1st, 2nd
- Lifespan: 8 years
Why is it better than the Safety 1st Jive?
- Higher rear-facing weight limit (+3”; 43” vs 40”)
- Zip off cover for easy removing
- More reclines (+7; 9 vs 2)
- LockSure belt locking system
- DuoGuard for better safety rating
Why is it worse than Safety 1st Jive?
- Costs more (+$200; $299.99 vs $99.99)
- Heavier car seat weight (+10 lb; 25 lb vs 15 lb)
- Less cup holder (-1)
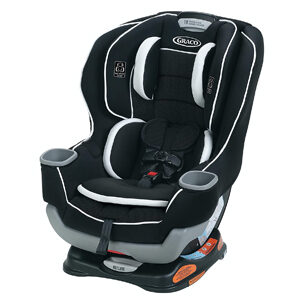
- Weight range (lb): 5-50 (RF); 22-65 (FF)
- Height limits: 49” (RF & FF)
- Stage: 1st, 2nd
- Lifespan: 10 years
- Suitable: Birth to 4~5 years old
Why is it better than Safety 1st Jive?
- Higher rear-facing weight limit (+10 lb; 50 lb vs 40 lb)
- Higher rear-facing height limit (+9"; 49" vs 40")
- More reclines (+7; 9 vs 2)
- Better safety rating with ProtectPlus technique
Why is it worse than Safety 1st Jive?
- More expensive (+$120; $211.99 vs $99.99)
- A bit heavier (+ 4 lb; 19 lb vs 14.3 lb)
- Weight range (lb): 5-40 (RF); 20-65 (FF)
- Height limits: 40” (RF); 49" (FF)
- Stage: 1st, 2nd
- Lifespan: 10 years
Why is it better than the Safety 1st Jive?
- Higher rear-facing weight limit (+3”; 43” vs 40”)
- Zip off cover for easy removing
- More reclines (+7; 9 vs 2)
- LockSure belt locking system
- DuoGuard for better safety rating
Why is it worse than Safety 1st Jive?
- Costs more (+$200; $299.99 vs $99.99)
- Heavier car seat weight (+10 lb; 25 lb vs 15 lb)
- Less cup holder (-1)