
Graco SlimFit 3 in 1
Face Rear & Front
- Weight Limit (lb): 5-40 (RF); 22-65 (FF); 40-100 (Booster)
- Height Limit: 49" (RF &FF); 57” (Booster)
- Age Limit: Birth-8 Years Old
The Graco SlimFit 3 in 1 car seat is, without a doubt, an incredibly popular infant and toddler car seat. Coming into the market at $219.99, it’s by no means inexpensive but the Graco brand is trusted and the SlimFilt is an ideal option for parents who are looking to get the most out of their car seat investment. With a narrow width of 19.9 inches, it’s slim for a better fit in small vehicles and for growing families with two or three children, whilst promising long-lasting from infancy to toddlerhood to also big kids up until they are 100 pounds or 57 inches tall. There is an upgraded version – SlimFit3 LX with a narrower width at 16.75 inches to fit 3 across, as well as a few advanced safety features… but bear in mind these come with additional costs.
*Price may change due to e-commerce platform and brand sales promotion.
Graco SlimFit Review - Affordable 3 in 1 Car Seat
Pros & Cons
The good and the bad
What is it best for
Who we recommend it for
Value for Money
Is it worth the price tag?
Design
Dimensions, weight, color, etc
Safety Rating
Crash tests, FMVSS213, SIP
Performance
Weight/height limits, airplane, etc
Installation
Install with LATCH or seat belt
Alternatives
Other car seats to consider
1. Pros and Cons
Pros
- Affordable price
- Slim fit design
- 3 in 1 car seat for good years
Cons
- A bit difficult to install in rear-facing
- Not fit 3 across
2. Who Is It Best For?
Will the Graco SlimFit 3 in 1 Car Seat Be a Good Fit For Your Child and Family?
If you’re after a 3 in 1 car seat that lasts good years from your kid’s birth to their preteen and requires the basic safety features, the Graco SlimFit should be the car seat for you and your kid.
It’s not the cheapest on the market but its slim fit design, high capacity, and durable quality make this a stress-free travel gear option for both parents and kids.
It’s not the narrowest compared to those 3 across car seats and you don’t want to take it for air travel (it’s not that lightweight), but it does a decent job of transitioning from a rear-facing infant car seat to a forward-facing toddler car seat, and finally to a booster seat. It’s budget-friendly for most families.
3. Value for Money
Is the price tag worth it?
The finish of the Graco SlimFit is a sight for sore eyes, but that’s expected with a 3 in 1 car seat that is on the upper end of the mid-range in terms of price point.
It does what it needs to do, capable of transitioning from a rear-facing harness to a forward-facing harness, and finally to a belt-positioning highback booster seat, but there are a few shortcomings that make me question its value for money. It lacks advanced safety features and additional comfort features. Its performance can be matched and, in some cases, outperformed by cheaper models like the Diono Radian 3R.
However, it does open the door to being slimmer and lighter than the majority of convertible car seats on the market. So the manufacturer later launched another upgraded version – Graco SlimFit3 LX. If you need to install multiple car seats in the same row, let’s say three car seats sitting side by side, then you should pick up the upgraded version without any doubt.
4. Design
Dimensions and Width
The overall width is 10% slimmer in comparison to similar 3 in 1 seats on the market, which for most vehicles would not have any additional issues but it’s still worth being aware of if you have small cars or need to install multiple car seats in a row – putting the SlimFit next to another car seat could be a struggle.
The dimension of Graco SlimFit is 21.5″ x 19.9″ x 25.5″ (DWH).
It’s obvious that the 10% narrower width is based on the average width of all-in-one car seats between 20-22 inches. The final result is that Graco SlimFit measures 19.9 inches in width. That’s near to those best narrow car seats within 20-inch width, but not as good as those narrowest convertible car seats under 18.5 inches.
You should also consider the space it will need from the front to the back (depth). The 21.5-inch depth is not small or compact for small cars.
Portability
With a weight of 19.5 pounds, the SlimFit is okay for families who occasionally switch the car seat between the mom and dad’s vehicles. Most moms, even short ones, can manage this weight when it’s empty before installation.
Graco SlimFit 3 in 1 car seat is a good option for daily pickups and short-distance trips. However, if the car seat weight is your key criterion – like taking a car seat for traveling outbounds, it’s wise to consider investing in a more lightweight (around 10 pounds) convertible car seat.
But weight is not always the leading factor for a travel car seat. One of the competitors for SlimFit is Diono Radian 3R, which is heavier (25.9 lbs vs 19.5 lbs). But it has a higher score in the portability for its folding design. Plus, for families on the go, storing the car seat might also be a big problem, so there are some foldable car seats for easier carrying and storing.
See also the most portable car seats if you’re a parent who often takes your kid traveling on the road.
Colors
SlimFit features only three colors for boys and girls.
All three color options are relatively dark: Anable (with a purple insert); Darcie (with a bright gray insert), and Galactic (with a dark gray insert).
Only the Anable is similar to the car seats with purple color and is good for girls. If you prefer bright colors for baby and toddler girls, choose one of the best pink car seats.
It seems common that the car seat is only colored with limited parts, for example, the infant insert (or body support) or the canopy. Not the whole car seat piece will be painted with a specific color.
Headrest and Harness - 10 Positions
The Graco SlimFit has 10 positions for harness adjustment. That’s the same as the majority of more expensive 3 in 1 car seats.
There’s an easy-to-use harness adjustable system that allows parents to move the headrest and harness in a relatively perfect fit position for growing kids. Adjusting the headrest and harness is very foolproof, just squeeze the handle at the top to put the headrest in a desired given position.
What needs your attention is the harness straps’ positions. They’re different in rear-facing and forward-facing – totally opposite.
In rear-facing, the harness straps should be at or below the kid’s shoulders while the top of the kid’s head must be 1 inch under the red headrest handle button.
After switching to forward-facing, the harness straps should be at or above the kid’s shoulders while the top of the kid’s ears must be below the top of the headrest.
Reclines - 4 Positions
The SlimFit’s reclines are more than others within the same price range. It was designed with four positions for reclining. That’s better than Maxi Cosi Pria’s 3-position ($299.99).
The four reclining positions are used for both rear-facing and forward-facing. It’s averagely divided: two for rear-facing and two for forward-facing.
Positions 1 and 2 are for rear-facing and they are in blue color while positions 3 and 4 are for forward-facing in orange color.
If you’re planning to use Graco SlimFit for newborns, the first position would be the best option.
Also, you may need head or body support or both to keep babies cradled in an all-in-one car seat because they’re a bit bulkier and more spacious than infant car seats.
Body Support
Body support is included in the car seat for newborns and small infants in rear-facing mode. The body support is used to help raise babies so that they’re correctly harnessed with the harness straps under the shoulders. As long as your baby grows bigger and can meet this requirement, it should be removed.
So the body support is designed for comfort as well as safety. Follow the Graco SlimFit manual to properly place the babies in and use the body support.
Padding
Okay, I have to admit that the padding used in Graco SlimFit seems apparently less than more expensive models like the Graco Turn2Me.
However, it’s still comfy for your kid to stay along with their growth.
5. Safety Rating and Crash Tests
It’s safe to use the Graco SlimFit 3 in 1 car seat. It has been engineered and crash tested to meet or exceed US safety standards. This means that it has undergone rigorous testing to ensure that it provides a safe and secure fit for your child in the event of a crash.
In particular, the car seat has been tested to meet Federal Motor Vehicle Safety Standards (FMVSS 213), which are set by the National Highway Traffic Safety Administration (NHTSA). These standards are designed to ensure that car seats provide a high level of protection for children in the event of a crash.
Additionally, the Graco SlimFit 3-in-1 car seat is made of energy-absorbing foam and features side-impact protection, which is designed to provide additional protection for your child’s head, neck, and torso in the event of a side-impact collision.
More than these basic safety features for all car seats sold in the United States, the Graco SlimFit 3 in 1 car seat comes equipped with the manufacturer’s unique technique called ProtectPlus. All Graco car seats engineered with this technology will perform outstandingly in delivering protection from side, front, rear, and rollover.
So it’s not a surprise that Graco SlimFit 3 in 1 car seat received a four-star overall rating from the NHTSA.
However, it’s important for parents to note that a high safety rating for a car seat does not guarantee complete protection for your child, and it is still important to use the car seat properly and follow the manufacturer’s instructions to install the car seat. You should also regularly inspect the car seat for signs of wear or damage and replace it after any crash, even if it appears to be undamaged.
6. Performance
Weight and Height Limits
What are the height and weight limit for Graco SlimFit?
The overall height and weight limit for Graco SlimFit is 100 lbs/57″. That’s also the upper size for the third booster stage. As it is a 3 in 1 car seat, we still want you to know what is the height and weight limit for Graco SlimFit for each stage.
Let’s start with the first rear-facing harness stage. Designed for newborns, the Graco SlimFit is able to accommodate a baby between 5 to 40 pounds. The height limit for rear-facing is not given publicly while the manufacturer gives a tip that the kid’s head should be 1 inch below the handle. We finally found this data in the Graco SlimFit manual – the rear-facing height limit is 49″.
That’s the same as the height limit after switching to forward-facing, making it as good as the best car seats for tall babies. Also, the 40-lb and 49-in combination is good to extend rear-facing rides and to keep your kids rear-facing at 2 years old.
The next is the forward-facing harness stage. This should be the most boring car seat stage to talk about as 99 percent of car seats with a 5-point harness have the same upper height and weight limit for this stage – 65 lbs/49″. So does Graco SlimFit. Kids between 3-5 years of age are typically in this stage. See also other recommended car seats for 3 year olds, for 4 year olds, and for 5 year olds. If you want to extend the forward-facing harness time, i.e. a higher height limit for forward-facing, check Chicco Fit4. It has a 54-inch harness height.
The booster stage is the last. So the height and weight limit is the same as that for the car seat: 100 lbs/ 57″. However, there is also a minimum booster requirement because the child safety laws ask for that. In the US, the kids can sit in a booster seat following any of the below rules:
- At least 40 pounds, or
- 4 years or older
The Graco SlimFit also states this booster weight and age requirements, as well as the 43-inch height requirement, in the manual.
Stage / Modes
It’s easy to know how many car seat stages the Graco SlimFit will go through from its name. It’s a 3 in 1 car seat, so it can be used for three stages: rear-facing harness, forward-facing harness, and booster.
However, some models have the words “3-in-1” in their names, but they are not real 3 in 1 car seats. The difference is caused by the modes in the booster stage. Some car seats can be used as a high-back booster (with back support) and a no-back booster (with no back support).
We have compared and listed the differences in our post on 3 in 1 car seats. You can easily know this by checking if the 3 in 1 car seat supports the rear-facing harness stage or not; if yes, it’s a real 3 in 1 car seat. Otherwise, it’s actually a booster seat with a 5-point harness and the backrest can be removable to be a backless booster seat.
The Graco SlimFit does not have additional modes. That’s one of the drawbacks compared to 4Ever DLX. The latter is a 4 in 1 car seat and features a detachable seat pad.
Age Range
There are three factors that decide how many good years the Graco SlimFit will serve your kid.
First is the size limit. The top height and weight limit for Graco SlimFit is 100 lbs/57″. That means it will be a good car seat recommendation for kids around 8-10 years old. See also the best car seats for 7 years or older.
Second is the child’s size. How much your kid weighs and how tall your kid is determined what stage they should choose to use the car seat. If the kid is at average growth pace, they can use the Graco SlimFit until 8 years old, which is the minimum age requirement for a kid to stop using a car seat. If the boy or the girl grows faster than their peers and probably reach the 57-inch height limit at seven years and a half, he or she can still get out of the car seat.
Parents should also consider the car seat’s lifespan. It can be used before it expires. Child safety experts recommend not using a car seat when it expires. Luckily, Graco SlimFit features a long 10-year usable lifetime.
We talk about the age range for Graco SlimFit on one condition – the car seat was not used in a crash. If it has been used in a mid or severe collision, you’d better replace it with another car seat.
Airplane
Is Graco SlimFit 3 in 1 FAA approved?
Graco SlimFit 3 in 1 car seat is FAA approved to use on a plane. However, you can use it only in the two harness stages.
In the Graco SlimFit manual, the manufacturer says that the car seat is certified for airplane use by the Federal Aviation Administration for the rear-facing harness and forward-facing harness stages. You can’t use it on a plane after switching the car seat to booster mode.
But we don’t recommend you take the Graco SlimFit on a plane because of its weight. Check the portability rating for this car seat to explore more about the reason why you’d better not take it for air travel.
Lifespan
How long is Graco Turn2Me good for
The SlimFit’s lifespan is similar to others within the same type. As previously mentioned, it has a maximum usable life of up to 10 years.
What needs your attention is that the lifespan is counted from the date of manufacture, not the day when you purchase it. So the real-time you use the Graco SlimFit should be shorter than 10 years.
The expiration date of Graco SlimFit is not directly given on the white label. You’ll need to calculate that.
Expiration date = Lifespan + the date of manufacture
Different car seat brands provide different solutions. Some others imprint the expiration date on the white label.
See also when Graco car seats expire
Further Information
Warranty
Like all other Graco car seats, the SlimFit comes with a limited warranty. The length of the warranty can vary depending on the country and retailer you purchase it from.
Typically, Graco provides a one-year limited warranty from the date of purchase that covers any defects in materials and workmanship.
It’s always a good step to register the car seat once you get it and plan to keep it.
7. Graco SlimFit Installation
Before starting to install the car seat, you may where to put it. The center of the back seat is probably the safest position to install a car seat.
If possible, install the car seat on that spot. If that seat is not applicable for a proper installation, for example lacking a shoulder belt, either seat on the side would be safe. You may choose any of them based on your family’s and kid’s needs.
Install Graco SlimFit Rear-Facing
Install Using LATCH Connectors
1. Make Sure Lower Anchor Strap is in the Rear-Facing Belt Path. Marked With a Blue Label If it is not, see the instructions in the manual to move lower anchor attachment.
2. Store Tether Strap. Attach tether hook to the plastic bar on either side of the car seat.
3. Recline the Car Seat. Place the car seat in recline position 1 or 2.
4. Remove Lower Anchor Connectors from Storage Location. Push in on the red buttons on the lower anchor connectors and remove from storage position.
5. Extend the Lower Anchor Strap. For easier installation, extend the lower anchor strap to its maximum length by pressing the gray button and pulling on the strap.
6. Place Car Seat Rear-Facing in Back Seat of the Vehicle. Place rear-facing in vehicle seat and center the car seat between the lower anchors. The base should sit as flat as possible on the vehicle seat. Make sure base is a minimum of 80% on the vehicle seat.
7. Check the Level Indicator. Vehicle MUST be on level ground. Ball must be completely in the blue zone. Readjust the incline if needed. Or if needed, rolled towels may be placed under the car seat at the vehicle seat crease, until the ball is completely in the blue zone.
8. Attach Lower Anchor Connectors to Vehicle’s Lower Anchors. Lower anchor strap should lie flat and not be twisted. Lower anchor attachment can ONLY be used if the vehicle lower anchor spacing is 11 inches (28 cm) from the center of one lower anchor to the center of the other lower anchor.
9. Tighten the Lower Anchor Strap. Press down firmly in the center of the car seat while tightening the lower anchor strap.
10. Test For Tightness. Grab the sides of the seat where the lower anchor strap is and slide the car seat side-to-side and front-to-back. If the seat moves less than 1” (2.5 cm), it is tight enough. Note: For easier tightening, you may need to pull the tail of the lower anchor strap through the belt path as shown.
11. Check the Level Indicator. Vehicle MUST be on level ground. Ball must be completely in the blue zone. Readjust the incline if needed. Or if needed, rolled towels may be placed under the car seat at the vehicle seat crease, until the ball is completely in the blue zone. Secure your child with the 5-point harness. Recheck the level indicator with child in seat.
Install Using Vechile Seat Belt
1. Recline the Car Seat
Place the car seat in recline position 1 or 2.
2. Store Tether and Lower Anchor Straps
Attach tether hook and lower anchor connectors to the plastic bars as shown. Remove the slack from both straps.
3. Place Car Seat Rear-Facing in Back Seat of the Vehicle
Place the base flat on the vehicle seat. Push it back until the front of the car seat touches the vehicle seat back. Make sure base is a minimum of 80% on the vehicle seat.
4. Check the Level Indicator
Vehicle MUST be on level ground. Ball must be completely in the blue zone. Readjust the incline if needed. Or if needed, rolled towels may be placed under the car seat at the vehicle seat crease, until the ball is completely in the blue zone.
5. Route the Vehicle Seat Belt
Thread vehicle seat belt through the rearfacing belt path (marked with a blue label) and buckle it. The seat belt should lay as flat as possible and not be twisted. Note: It may be easier to route the vehicle seat belt by lifting seat pad up to expose the belt path. Make sure vehicle seat belt is in front of the buckle strap.
6. Lock the Vehicle Seat Belt
In most vehicles today, slowly pull the shoulder belt all the way out and then let it go back in. You will hear a clicking sound. Slowly pull out on the belt and it should be locked. If not, review your car’s owner manual and section 9-F. Review your vehicle’s owner manual for vehicle seat belt use.
7. Tighten the Vehicle Seat Belt
Press down firmly in the center of the car seat. Pull on the shoulder belt to tighten while feeding the slack back in the retractor.
8. Test For Tightness
Grab the sides of the seat where the vehicle seat belt is and slide the car seat side to side and front to back. If the seat moves less than 1” (2.5 cm), it is tight enough.
9. Check the Level Indicator
Vehicle MUST be on level ground. Ball must be completely in the blue zone. Readjust the incline if needed. Or if needed, rolled towels may be placed under the car seat at the vehicle seat crease, until the ball is completely in the blue zone. See section 6-A to secure your child. Recheck the level indicator with the child in the seat.
Install Graco SlimFit Forward-Facing
Forward-facing Installation with LATCH
1. Make Sure Lower Anchor Strap is in the Forward-Facing Belt Path
Marked with Orange Label
If it is not, see section 7-A.
2. Recline the Car Seat
Place the car seat in recline position 3 or 4.
3. Remove Lower Anchor Connectors and Tether from Storage Locations
Push in on the red buttons on the lower anchor connectors and remove from storage position. Unhook tether and lay it in the seat.
4. Extend the Lower Anchor Strap
For easier installation, extend the lower anchor strap to its maximum length by pressing the gray button and pulling out on the strap.
5. Place Car Seat Forward-Facing in Back Seat of the Vehicle
Place the base flat on the vehicle seat. Push it back firmly until the back of the car seat touches the vehicle seat back. Center the car seat between the lower anchors.
Make sure base is a minimum of 80% on the vehicle seat.
6. Attach Lower Anchor Connectors to Vehicle’s Lower Anchors
Lower anchor strap should lay as flat as possible and not be twisted. Lower anchor attachment can ONLY be used if the vehicle lower anchor spacing is 11 inches (28 cm) from the center of one lower anchor to the center of the other lower anchor.
7. Tighten the Lower Anchor Strap
Press down firmly in the center of the car seat while tightening the lower anchor strap.
8. Attach Tether Strap
Extend the tether by lifting up on the tether lock and attach. Consult vehicle’s owner manual for specific location.
9. Tighten Tether Strap
Remove all the slack.
10. Test For Tightness
Grab the sides of the seat where the lower anchor strap is and slide the car seat side to side and front to back. If the seat moves less than 1” (2.5 cm), it is tight enough. See section 6-A to secure your child.
Forward-Facing Installation Using Vehicle Seat Belt
1. Recline the Car Seat
Place the car seat in recline position 3 or 4.
2. Store Lower Anchor Connectors
Attach the lower anchor connectors to the plastic bar as shown and remove the slack from the strap.
3. Place Car Seat Forward-Facing in Back Seat of the Vehicle
Place the base flat on the vehicle seat. Push it back firmly until the back of the car seat touches the vehicle seat back.
4. Unhook Tether Strap From
Storage Location and Lay it in the Seat
5. Route the Vehicle Seat Belt
Thread vehicle seat belt through the forward-facing belt path (marked with an orange label) and buckle it. The seat belt should lay as flat as possible and not be twisted. Review your vehicle’s owner manual for vehicle seat belt use
6. Lock the Vehicle Seat Belt
In most vehicles today, slowly pull the shoulder belt all the way out and then let it go back in. You will hear a clicking sound. Slowly pull out on the belt and it should be locked. If not, review your car’s owner manual and section 9-F.
7. Tighten the Vehicle Seat Belt
Press down firmly in the center of the car seat. Pull on the shoulder belt to tighten while feeding the slack back in the retractor.
8. Attach Tether Strap
Extend the top tether by lifting up on the tether lock and attach. Consult the vehicle’s owner manual for a specific location.
9. Tighten Tether Strap
Remove all the slack.
10. Test For Tightness
Grab the sides of the seat where the forward-facing belt path is and slide the car seat side to side and front to back. If the seat moves less than 1” (2.5 cm), it is tight enough. See section 6-A to secure your child.
Install Graco SlimFit in Booster Mode
1. Store the Harness
Push down on the harness release lever while pulling out on the harness straps at the chest clip.
(A) Raise the headrest to the highest position.
(B)Unbuckle the chest clip and the buckle.
(C and D)Remove the Lower Seat Pad to Expose the Harness Storage Door
(E, F and G) Move Buckle Strap to Rear Slot
Open the Harness Storage Door and Place Harness, Chest Clip, Buckle, and Buckle Tongues Inside Storage Compartment.
Close the Door Replace Seat Pad .
Move the headrest back to its proper position for your child.
2. Recline the Car Seat
Place the booster seat in recline position 4.
3. Place the Booster Seat Forward-Facing in the Back Seat of Vehicle
Place forward-facing on a vehicle seat that has a lap/shoulder seat belt. The base should sit as flat as possible on the vehicle seat.
4. Make Sure Lower Anchor Strap is in the Forward-Facing Belt Path, Marked with Orange Label
If it is not, see section 7-A.
5. Unhook Tether Strap From Storage Location and Lay it in the Seat.
6. Connect Lower Anchor Connectors to Vehicle’s Lower Anchors
Lower anchor strap should not be twisted.
5. Unhook Tether Strap From Storage Location and Lay it in the Seat
7. Tighten the Lower Anchor Strap
Remove all the slack.
8. Attach Tether Strap
Extend the tether by lifting up on the tether
lock and attach. Consult vehicle’s owner manual for specific location.
9. Tighten Tether Strap Remove all the slack.
10. Thread the Vehicle Shoulder Belt Through Shoulder Belt Guide
on the Headrest
See section 6-B to secure your child.
Graco SlimFit Car Seat Manual
The user manual is the most important thing you need to make sure it’s included in the package. You should always read the user manual before starting to install and use it for riding your child.
The Graco SlimFit manual is stored in a small storage slot on the back but you can always find the online user manual on its official website, or download the PDF here.
8. Specification and Comparison
| Brand | |
| Brand | Graco |
| Type | |
| Suitable for | Newborns, toddlers, and preschoolers |
| Positions | Rear-facing and forward-facing |
| Design | |
| Portability (1-10) | 7.5. Slim and heavy duty |
| Weight (lb.) | 19.5 |
| Weight limit (lb.) | 4-40 (RF); 22-65 (FF); 40-100 (Booster) |
| Height limit (inch) | 49” (RF &FF); 57″ (Booster) |
| Dimension | 21.5″ x 19.9″ x 25.5″ DWH |
| Cup holder | Two |
| Performance | |
| Age Range | Birth-8 years or older |
| Stage | 1st, 2nd, 3rd |
| Longevity | 0-10 years old |
| Installation | LATCH and seat belt |
| Headrest Positions | 10 |
| Recline Positions | 4 |
| Airplane | Yes |
| Lifespan | 10 Years |
| Extra Features | 10% slimmer design |
Graco SlimFit vs SlimFit3 LX
The SlimFit3 LX is an upgraded sibling with a few improvements in safety, ease to use, and installation. The 4Ever DLX is a classic car seat receiving a lot of appraisements from thousands of parents. So we do this comparision.
| Car Seats Comparison | SlimFit | SlimFit3 LX | 4Ever DLX |
|---|---|---|---|
| Price | $219.99 | $279.99 | $329.99 |
| Modes | Three | Three | Four |
| Weight limit (lb) | RF:5-40 / FF: 22-65 / Booster:40-100 | RF:5-40 / FF: 22-65 / Booster:40-100 | RF:4-40 / FF: 22-65 / Booster:40-120 |
| Height limit (in) | RF:49"* / FF: 49" / Booster:57" | RF:49"* / FF: 49" / Booster:57" | RF:49"* / FF: 49" / Booster:57" |
| Headrest Adjustable Positions | 10 | 10 | 10 |
| Reclines | 4 | 6 | 6 |
| Steel Reinforced | ✓ | ✓ | ✓ |
| Cup Holder | Two | Two | Two |
| LATCH | InRight LATCH | InRight LATCH | InRight LATCH |
| Type | All-in-one | All-in-one | |
| Belt Lock-Off | - | ✓ | ✓ |
| Easy-to-Remove Seat Pad | - | ✓ | ✓ |
| Breathable Fabrics | - | ✓ | - |
| Fits 3 Across | - | ✓ | - |
*About the 49″ height limit for rear-facing: The top of the head must be 1” (2.5 cm) below the headrest adjustment lever.
9. FAQs on Graco SlimFit
Is Graco SlimFit 3 in 1 FAA approved?
Yes, the Graco SlimFit 3 in 1 car seat is FAA approved for airplane use. But this has one condition – the car seat should be used with an internal harness.
That means the SlimFit can only be used rear-facing or forward-facing because there is only a lap belt for security on the seat on most airlines, whilst booster seats are required to be installed with the lap-shoulder belt system.
But it’s not easy to carry and use the car seat on a plane. If you need one for air travel, better find some lightweight convertible car seats or car seats that are foldable for effortless carrying and storage.
The best travel car seat should be the Doona Infant Car Seat Stroller. It’s also the only car seat with four wheels on the market till this post is published.
Does Graco SlimFit turn into a booster?
As a 3 in 1 car seat, the SlimFit can be turned into a booster. However, it’s not recommended to switch it to the booster mode too soon. The best is to use the car seat in the 5-point harness for as long as possible until the kid approaches 65 pounds or 49 inches. (That’s the height and weight limit for a forward-facing harness.)
Also, to use the Graco SlimFit as a booster seat, make sure your kid is at least 40 pounds or 4 years or older. That’s the minimum booster requirement for a car seat as well as the child safety seat laws in the US.
How wide is the Graco SlimFit 3 in 1?
According to the dimension given by Graco, the SlimFit width is 19.9 inches.
The manufacturer boasts that it’s 10% slimmer than the majority of the all-in-one car seats on the market. The 19.9-inch width of Graco SlimFit is good and competitive to have a position on our ranking for the best narrow car seats (based on the 20-inch width).
But it’s not as narrow or slim fit as its upgraded sibling – SlimFit3 LX, which is a 3 across car seat at a 16.75-inch width and is perfect to fit three across in most vehicles.
Can you fit 3 Graco slim fits in a row?
Probably not. Graco SlimFit has a width of 19.9 inches. That’s not slim or narrow enough to fit in a car seat with inner dimensions of three seats in the back under 60 inches, while this is not a reachable width for most vehicles in the US.
If you need to fit three car seats in a row, it’s better to pay a bit more to get its improved sibling – Graco SlimFit3 LX. Move to the comparison table of SlimFit vs SlimFit3 LX to learn about the differences between them.
Can Graco SlimFit go on plane?
Theoretically, you can take SlimFit to a plane. It’s FAA approved for airplane use.
But it’s not recommended to do this. It’s still bulkier than those narrow convertible car seats and heavier than those lightweight convertible car seats. If you do need to take a car seat for travel, choose a narrow or light one. Or the car seats that are foldable are also good choices. They’re easier to carry and store.
Can the Graco SlimFit go in the middle seat?
Yes, the Graco SlimFit can go in the middle seat, for most cases. It’s slim and can be installed in the middle seat of most vehicles, even though this seat is considered the narrowest, as well as the safest. See also the safest position for installing a car seat.
However, there is one situation in that you may not put the SlimFit into the middle seat:
There is only a lap belt in the middle seat but you are planning to switch the car seat to booster mode. As per car seat laws in the US, the booster seats must be installed using a lap-shoulder belt system.
Of course, where to install the Graco SlimFit depends on the very specific needs of various families.
When can Graco SlimFit face forward?
Graco SlimFit can face forward when your kid is at least 1 year old. However, it’s not recommended to turn it face forward too soon. Two reason for this:
First, some states’ local car seat laws require that kids should stay rear-facing until 2 years old. These states include New York, Connecticut, Illinois, Maine, Louisiana, Nebraska, New Hampshire, New Jersey, Oregon, South Carolina, Virginia, and Washington.
Second, child safety experts strongly advise parents to keep the kids rear-facing for as long as possible because rear-facing is safer than forward-facing and the kids would be less likely to be injured in rear-facing.
10. Alternatives
What other 3-in-1 car seats should you consider?
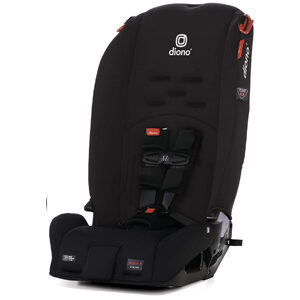
Diono Radian 3R
- Weight range (lb): 5-40 (RF): 22-65 (FF); 40-100 (Booster)
- Height limits: ~49" (RF&FF); ~57” (Booster)
- Age Limit: Birth-8 years or older
- Stage: 1st, 2nd, 3rd
- Lifespan: 10 years
Why is it better than the Graco SlimFit?
- Cheaper price ($199.99 vs $219.99)
- Higher weight limit in booster (+20 lb: 120 lb vs 100 lb)
- Higher rear-facing weight limit (50 lbs vs 40 lbs)
- Narrower profile to fit 3 across (17” vs 19.9”)
- Foldable design
Why is it worse than the Graco SlimFit?
- Heavier in weight (25.9 lbs vs 19.2 lbs)
- Lacking recline positions (4 vs 2)
- No cup holders
- No seat belt-locking system for tight installation
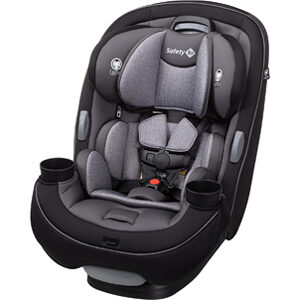
Safety 1st Grow and Go
- Weight range (lb): 5-40 (RF): 22-65 (FF); 40-100 (Booster)
- Height limits: ~49" (RF&FF); ~57” (Booster)
- Age limit: Birth-7 years or older
- Stage: 1st, 2nd, 3rd
- Lifespan: 10 years
Why is it better than the Graco SlimFit?
- Cheaper price ($199.99 vs $219.99)
Why is it worse than the Graco SlimFit?
- Lower booster height limit (52” vs 57”)